Down Top Quilt

Project goal:
- Don’t mess up down project
- Really light (less than 1 lb)
- Good for 3 season/warmer weather
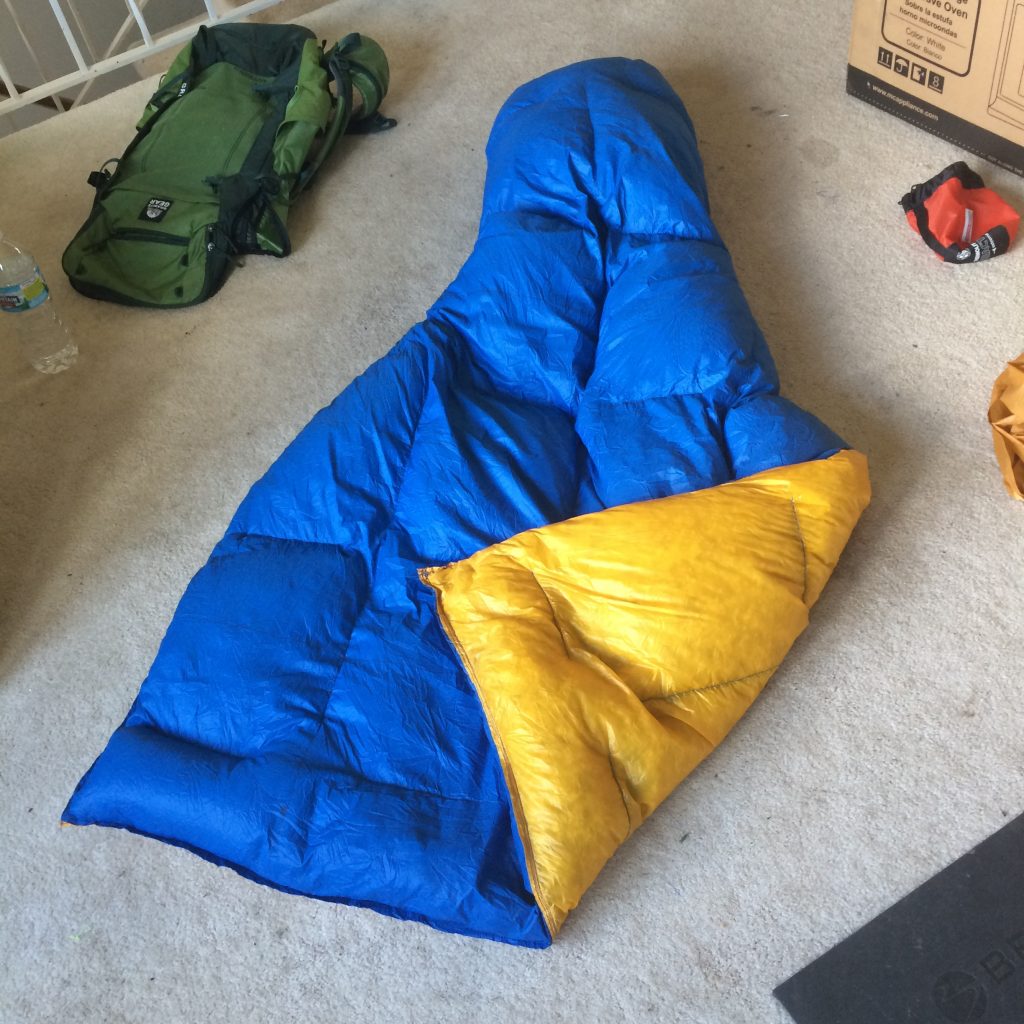
Final specs (click here to go to finished pics):
- Total weight: 427 grams, 15.06 oz, .94 lbs
- 66″ long, 44″ wide, 15″ wide footbox, 20″ sewn-in footbox
Materials:
- 9 oz HyperDRY 850 FP Goose Down
- 3 yards 1.0 oz HyperD diamond ripstop nylon – Royal Blue / Calendered
- 3 yards 0.66 oz MEMBRANE 10 taffeta nylon – Spectra Yellow
- ~20 ft 0.67 oz Noseeum Baffle material – 1.5″
- Gutermann MARA 70 thread – Royal Blue
Steps:
1. Draw detailed plan. I used the Karo Step method of baffling. Karo Step has open channels… for a better explanation, search on the internet. I made a grid pattern of 14″ boxes to plan the Karo Step.
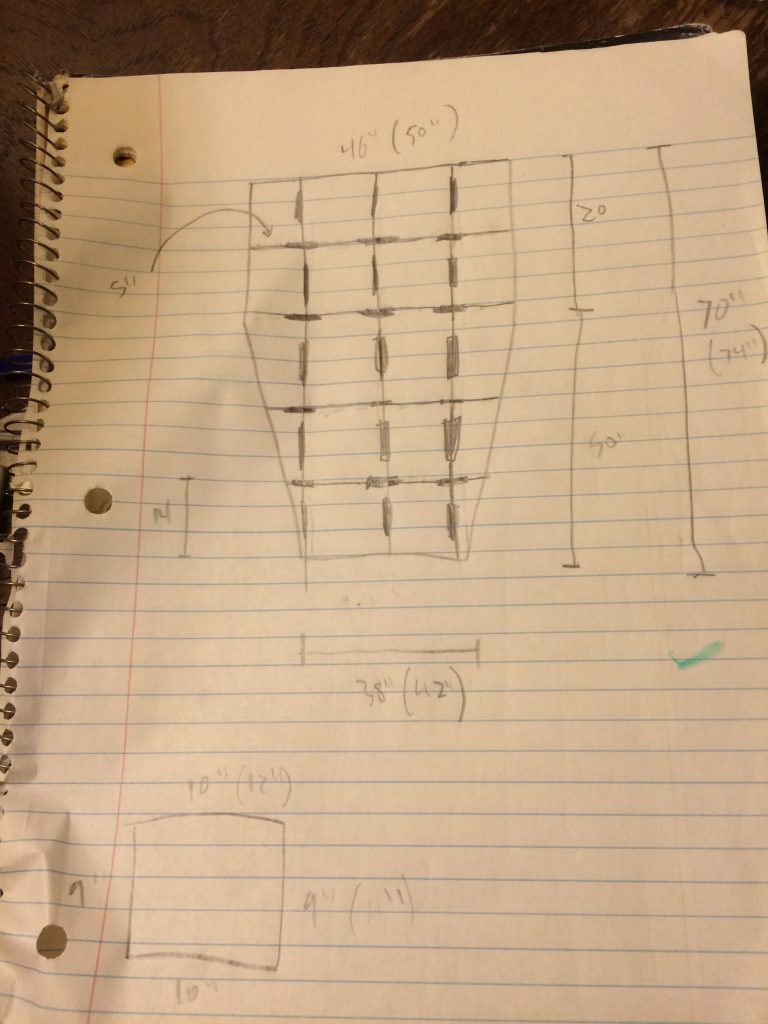
My initial goal was to have the quilt 70″ long, 46″ wide, and a tapered design. I wanted to sew the 6″ Karo baffles on with 8″ gaps.
2. Cut the main layers of fabric to size according to plans. The outside layer is the blue Diamond ripstop, inside is yellow taffeta. Hem every edge.
3. The next step is to draw the grid pattern on each layer of fabric. I used a magic marker to mark on the ‘wrong side’ of the fabric. Online, many people tape down each layer on a flat piece of floor. I noticed carpet was not a very effective surface to do this, so got creative and taped the fabric to the wall, which worked great.
According to the plan, draw a grid pattern of 14″ squares. I started by drawing the mid-line lengthwise and measuring 14″ on either side from there for the vertical lines. I measured down a bit from the top, perhaps 6″, and then measured 14″ down for each horizontal (width-wise) line.
4. Mark where to sew the baffles. This is a bit complicated. Essentially, there should be open areas (no baffles) where the grid lines intersect. It almost looks like small 8×8″ squares all said and done. Again, the pattern is 6″ baffle, 8″ space, 6″ baffle, 8″ space, etc…, etc… I think the easiest way to mark the baffles is to measure 4″ from each intersection, mark 6″, and ensure it’s 4″ to the next intersection. If you measured correctly, it should line up perfectly. I freestyled the edges of the fabric and just decided where would make sense to have an additional baffle.
5. When you have the first layer of fabric done, it is IMPERATIVE to follow the exact measurements so the baffle lines match up. If you sew one side of the baffle, then connect to the other side of fabric and it doesn’t match up exactly, you have irreversible problems. The grid pattern and baffle markings must match up perfectly.
6. Tape baffles in place onto one layer.
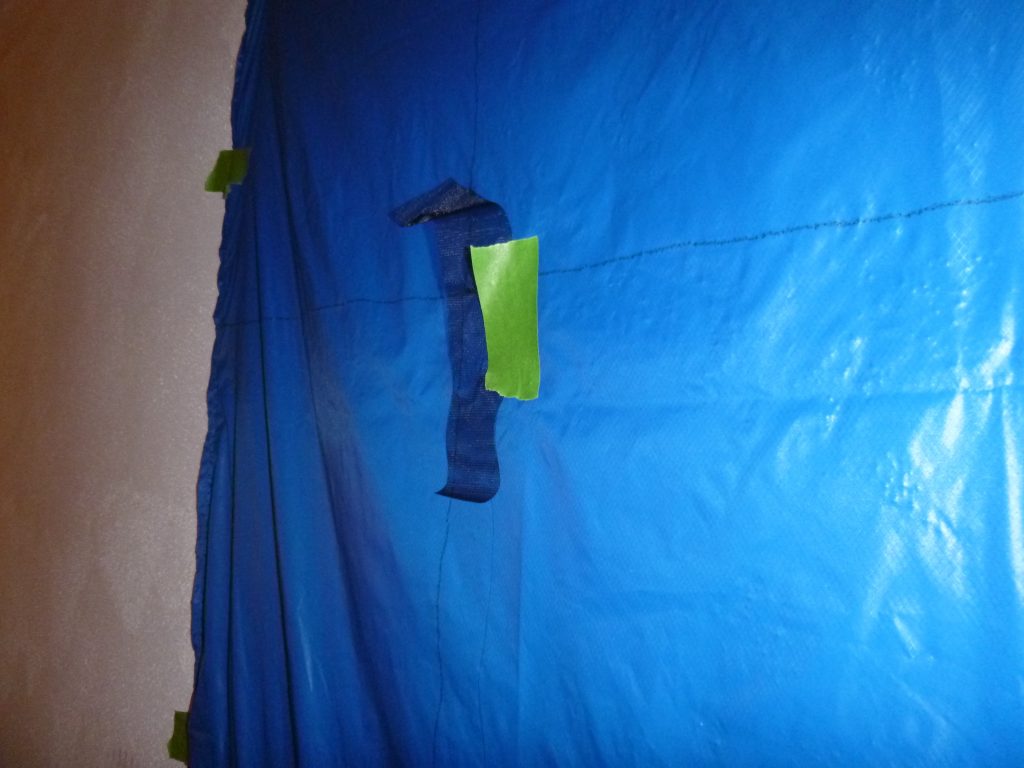

**Note**: The above picture has just the vertical (length-wise) baffles taped on. It was at this point that I realized my calculations were incorrect. Luckily, the two layers matched. My mistake was that the horizontal (width-wise) baffles were measured with only 6″ gaps in between. It ended up to be no issue, but a mistake nonetheless.
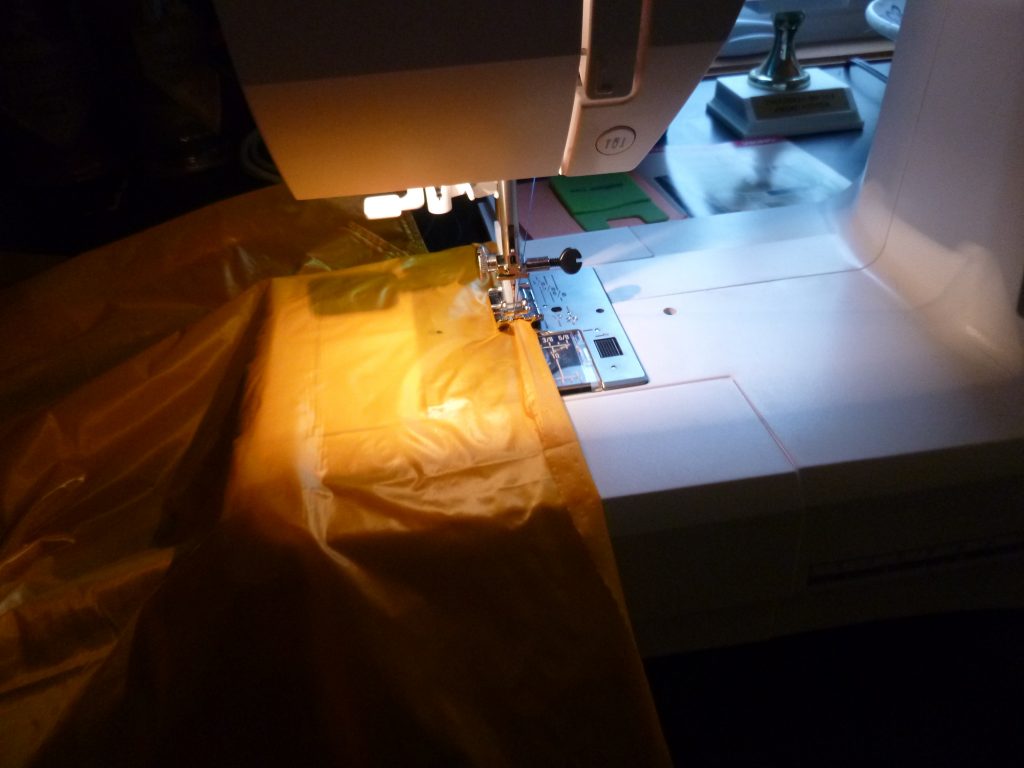
7. Sew baffles onto first layer. This is very straightforward, especially with the markings. Just follow the line and make them as straight as possible. Again, these MUST match up when you attach the other layer. To be clear, sew these on the ‘wrong side’ of the fabric.
8. When all of the baffles are sewn into place, it is time to sew the baffles onto the other piece of fabric. Unfortunately, I didn’t take any pictures of this, and there is no good explanation how to do this. Line it up, think it through, and take your time. This takes a fair amount of readjusting the fabric, and there is a high chance of sewing folds every which way. Think it through, be diligent with where you are sewing, and it will go smoothly.
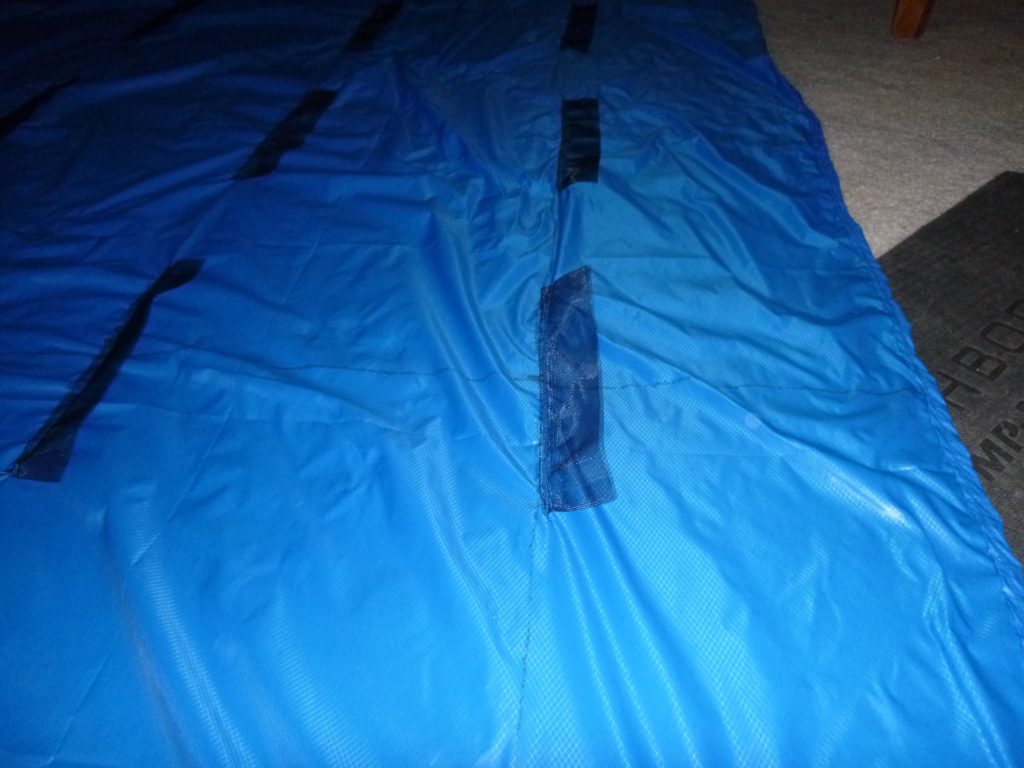
9. Sew edges. Quality check the baffles, and then line up each edge and simply sew ’em together. Make sure to keep one piece open to stuff the down in. I chose to leave a ~16″ section near the top corner open. It doesn’t really matter, but think of a place where you can easily push the down feathers deep into the quilt without being obstructed by a baffle. I sewed the edges twice for twice the reinforcement.
10. Connect lower part of quilt for sewn-in footbox. I chose to have a 20″ seam for the footbox area, so I measured up and sewed the two edges to create the tube shape. I spent extra time really reinforcing the ‘split’, as this is a high-stress area.
11. Make footbox. First, measure the circumference of the bottom of the quilt. Without doing too much math, I just laid the quilt flat on the ground, measured the length of the bottom and multiplied by two. Then, add up the four sides of the rectangular footbox to equal the sketchy measure of circumference. Cut squares of fabric, hem the edges, sew three edges, and stuff with a handful of down. Then, sew the last open edge up and you have the footbox.
12. Sew the footbox onto the quilt. Pins help tremendously on this part. I did this part inside-out to improve the look of the outside of the quilt.
13. Stuff with down. I used the Fronkey technique of stuffing down by going in my bathtub, and it worked great. I debated leaving some down for a different project, but figured what the heck, might as well use it all!
14. Sew last 16″ open section closed.
DONE
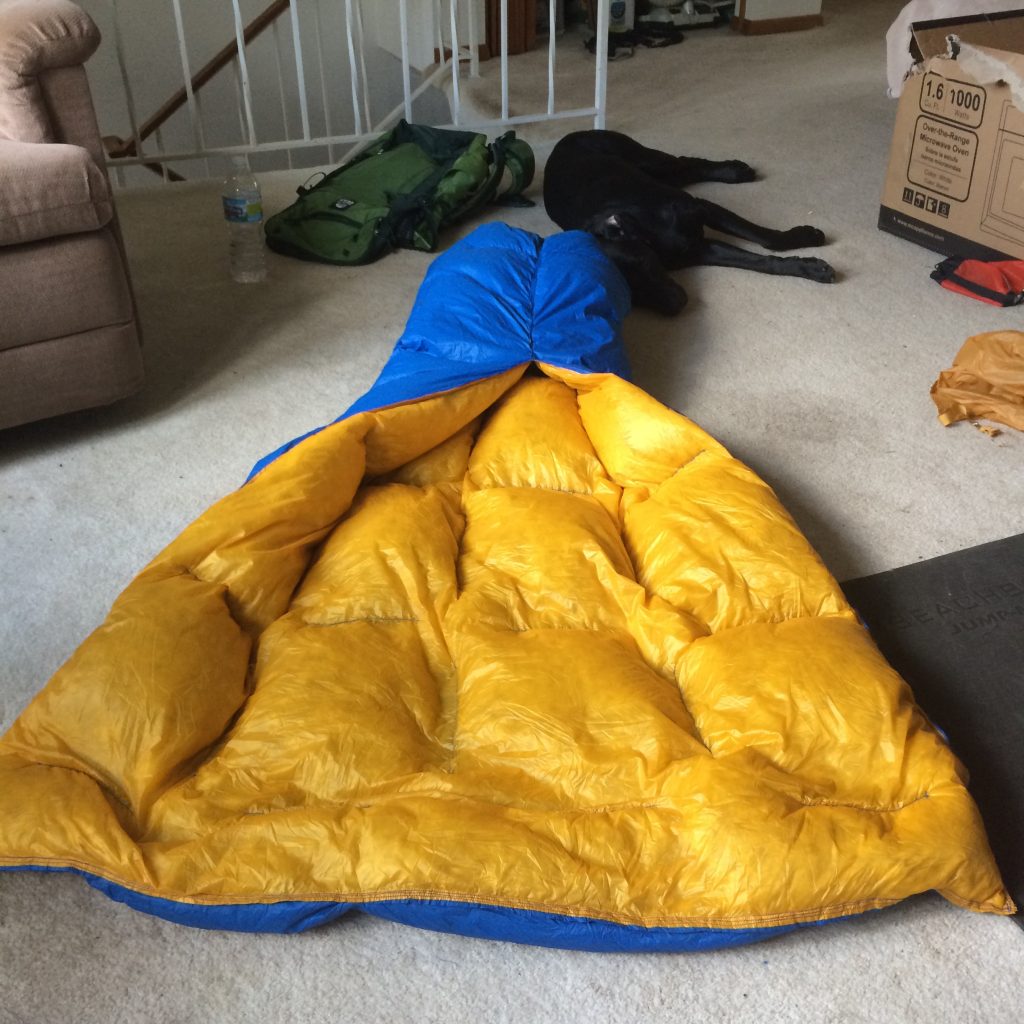
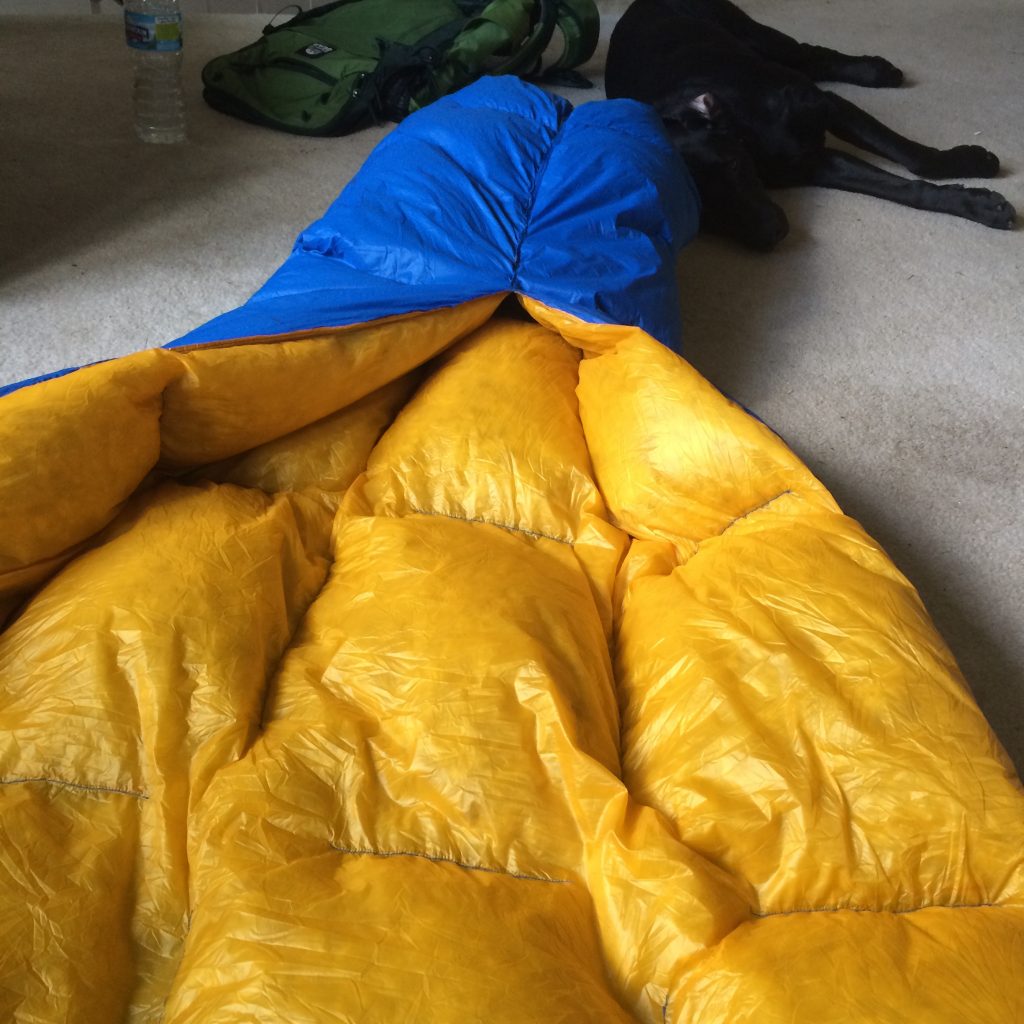
Comments: Notice the rectangular shape of the Karo Step, this is because of the mistake with the horizontal baffle spacing at 6″ instead of 8″ as the vertical (length-wise) baffle spacing.
0 Comments